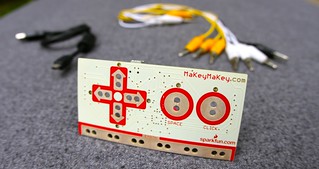
MaKeyMaKey works by sensing current flow through an object, such as a banana, through your body, toward ground.
But it requires the user to touch a ground wire or contact as well as the object you want to sense.
I was interested in getting rid of the ground wire so I looked into capacitive sensing.
There are a lot of articles about capacitive sensing, including the documentation of the Arduino CapSense library. Here's a few:
CapSense library documentation
Turn a pencil drawing into a capacitive sensor
3D position sensor using three capacitive sensing panels
You can find many more by searching for "capacitive sensor arduino", for example. Most of these use the CapSense library. The library tests how long it takes to charge a receiving pin to +5V using a circuit like this. (There are minor variations in the circuit in the various projects on the web.)
In this circuit, a human touching or coming near a contact point forms a capacitor which affects the time it takes to increase the voltage at the receiving pin. The resistor R is a large value, say 1MOhm to 10MOhm, which causes the voltage to increase to +5V on a negative exponential curve.
Experience with CapSense and Similar Approaches
The CapSense library certainly works, but with some caveats:- The circuit does not seems to discharge completely, making the "no touch" values increase from their power-on state. However, they seem to stabilize.
- The wires in the circuit are also sensitive to proximity, especially as the resistance R increases. Several projects suggest using shielded or twisted-pair wires to reduce this.
- I've had difficulty getting any of the projects to work on battery power. It appears that the discharge process is much slower while powered by batteries, possibly because the ground fluctuates.
Measuring Discharge Timing
Another approach was suggested in a project to create a touch-sensitive table lamp. Instead of measuring the time to charge the circuit, the approach is to completely charge, then cut off the input supply and measure the time to discharge. The author also reported problems with the time-to-charge approach and found this technique by searching the web. I've made some minor modifications to his circuit:Here a 1N4148 diode is used, as recommended by the author, to avoid having to change the output pin mode to high impedence after charging. I added a resistor to limit the charging current through the diode to keep the pin output well within safe limits. The charge current will be 5mA initially and decay exponentially. The total charge time is under 500ns.
The discharge resistor has a high value, here 10MOhm. The total capacitance of the human plus the object will be in the range of tens to hundreds of pico-Farads. That resistor value makes the discharge time at least 200us when no touch occurs. (With no touch object connected the time is about 225us on my setup.) The discharge current starts at .5uA and decays exponentially. The time to discharge goes up by at least 100us when the object is touched. This circuit has good sensitivity. I've tried it with coins, foil plates, bananas, and plant fronds. All require only a light touch to sense. Another plus with this approach is that there is no need for shielded wires. The downside to this approach is that it appears to be much less sensitive to non-contact sensing, albeit with greater reliability than the time-to-charge approach. The variance of the timing measurements is quite small.


Did you ever get it to work with a battery?
ReplyDeleteDid you ever get it to work with a battery?
ReplyDeleteHi Adrian, no, I was unsuccessful, and had to drop it because of the time required to get the MakeyMakey version working. I hope to revisit this in the future. I'm not an electrical engineer, but the problem appears to be grounding: it's difficult to discharge the system properly when isolated from a good, earth ground.
ReplyDelete